
In the case of React, we need to install a package called react-helmet to add title and meta tags for each router component. Also, for adding routes or multiple pages in a react app, we need a package called react-router-dom. But here in this article, we are discussing a framework of React library called Next.js and the steps to add title and meta tags for each page in a Next app.
Prerequisites
This article is about Next.js, a React framework. So the reader must be aware of the basic web development, React.js library, and Next.js framework before continuing with this article.
What we will learn
After completing this article, we will learn to,
- Create a Next.js app
- Adding pages in the app
- Building components
- Adding meta title and meta tags for each page
- Adding global styes and module-wise styles
Importance of title and meta tags in a web app
Also, Title and Meta description tags are important in gaining user click-through from search engine result pages (SERPs).
So, after deploying the Next.js app on the server, Google crawls each page and shows the search result with a meta description.
I have given an example search result of Sri Mathilakam Temple. It’s built with React and the /history will render the history page. We can see that the title and meta description there.

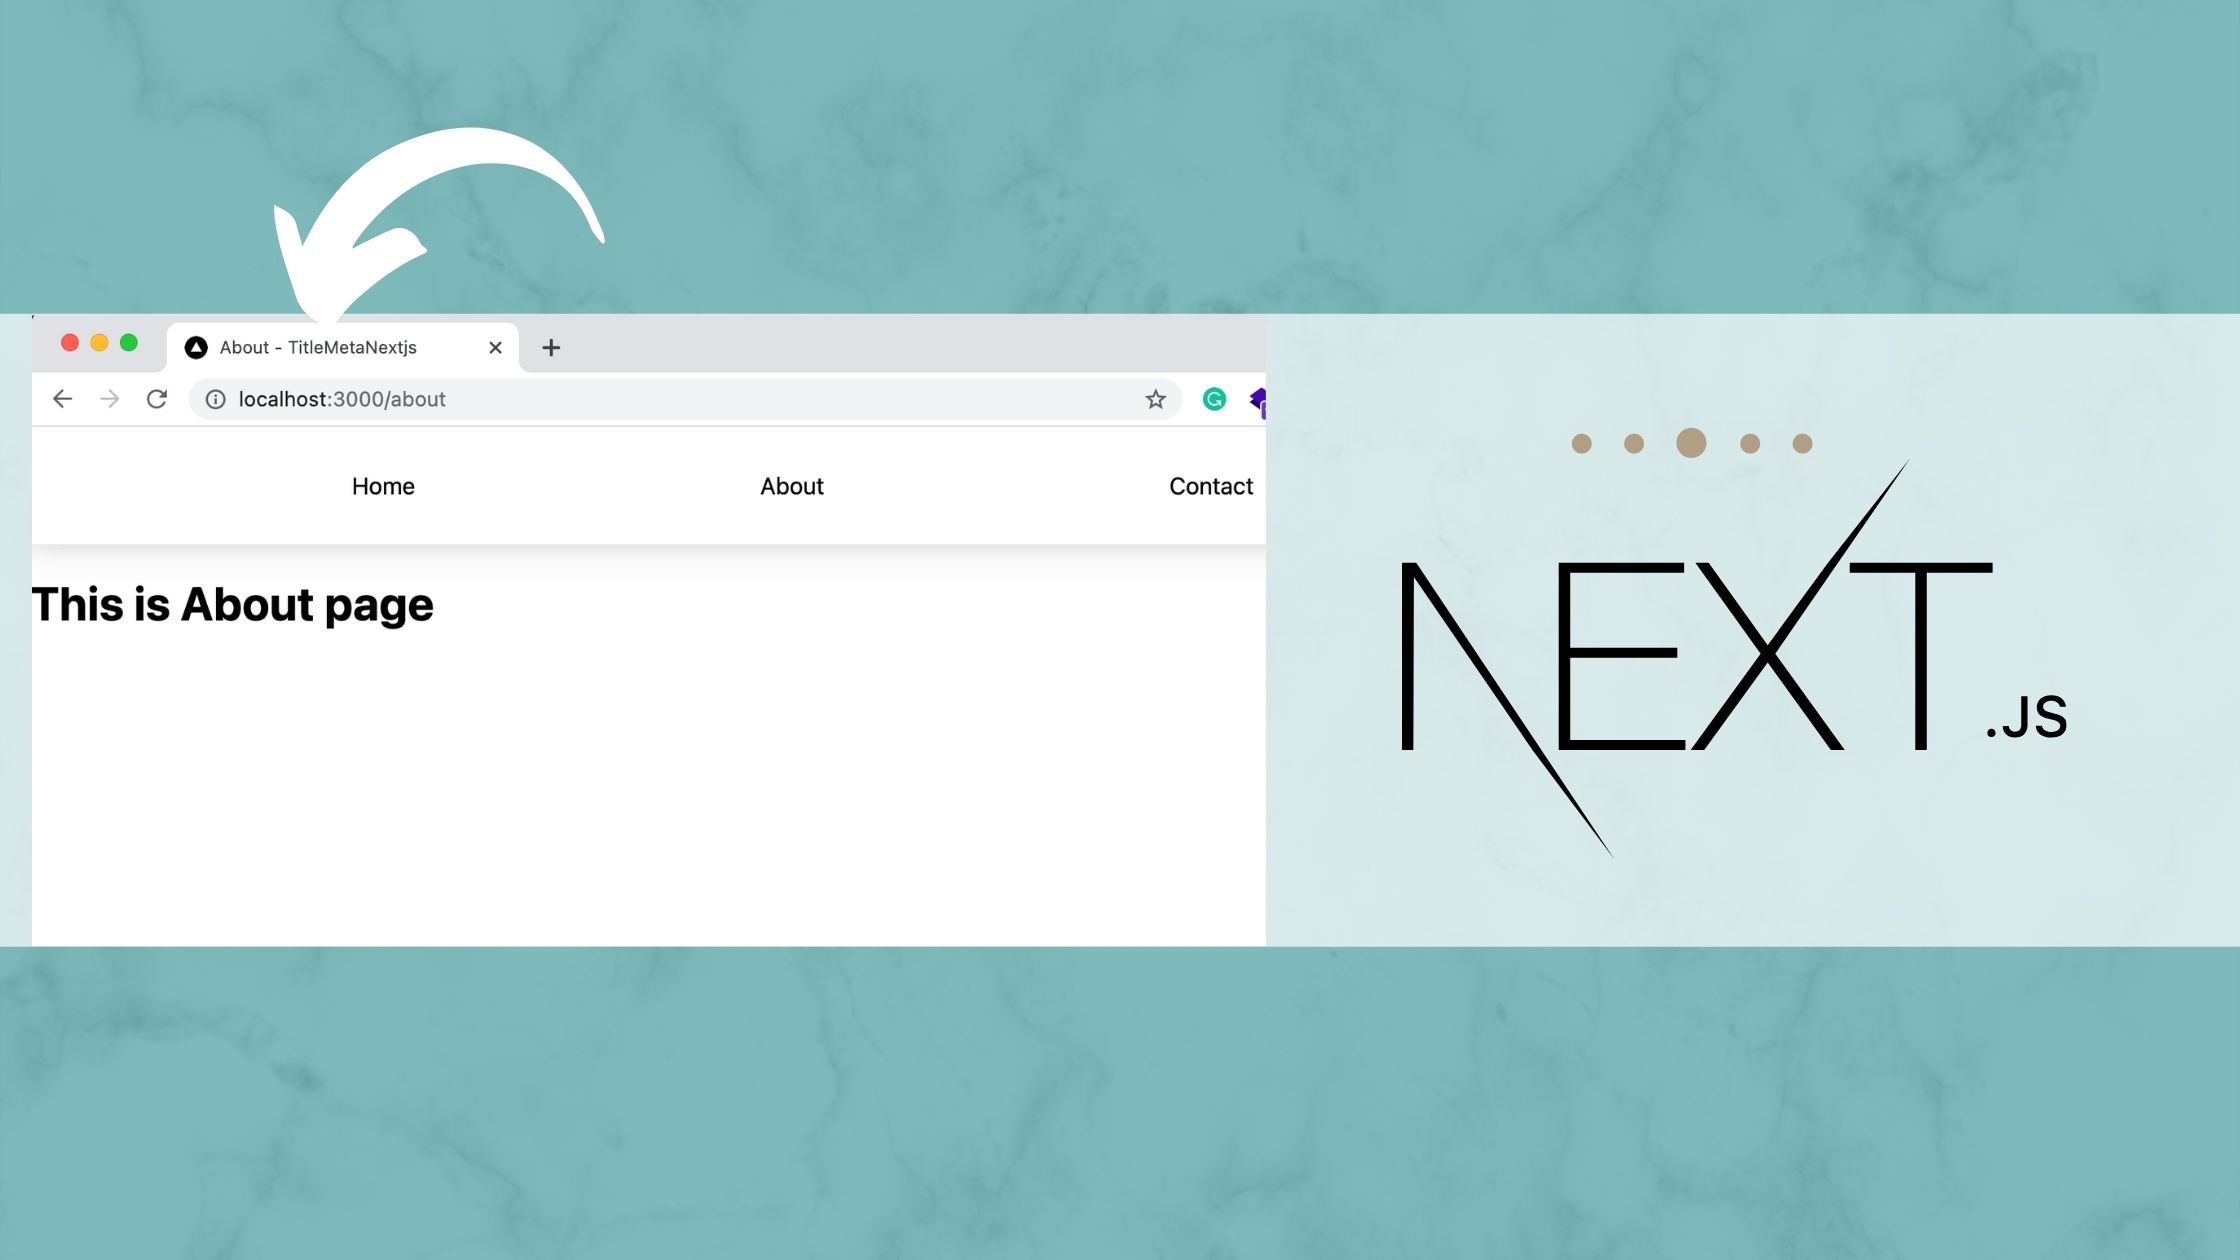
The title for each route component also helps identify the page from browser tabs.

About the project we are going to build in this article
I am explaining the topic with an example project. The below information will help you when start building the example app.
File structure
When start coding the app, the file structure of the entire app will help us a lot. Because I’m only giving the file name not the entire path information.

Workflow
We will get an exact idea of how the app works by analyzing the GIF below.

Routes and corresponding pages
The routes of this react application and its corresponding route components are described below.
| Route | Corresponding Page |
| / | Home page |
| /about | About page |
| /contact | Contact page |
How to Add Title and Meta Tags for Each Page in Next.js
Next.js is pre-bundled with a head component for appending elements to each page. We are using it append title and meta tags for each page of our Next.js app.
So let’s start the steps.
Create a Next.js project
After successfully installing Node.js on our system, we can start creating a Next.js project using the NPX tool.
npx create-next-app title-meta-nextjs
This will create a new Next.js project with the name title-meta-nextjs. We can open enter the project and open this with VS code.
Note: We must install VS code on our system before this step.
cd title-meta-nextjs
code .
This will open up our project in VS code. We can use the integrated terminal in VS code for executing further commands.
We can start the Next.js app locally on our machine with the command below.
npm run dev
This will start our app in port 3000 (http://localhost:3000).

Create a Navigation component
Before entering our topic, we can first create a Navigation component to route from one page to another. It contains 3 links, Home, About, and Contact. Clicking each will direct to its corresponding routes /, /home, and /about.

The complete Navigation component will be the same as below.
import styles from "../styles/Navigation.module.css";
import Link from "next/Link";

export default function Navigation() {
  return (
    <div className={styles.navigation}>
      <Link href="/">
        <a>
          <div className={styles.item}>Home</div>
        </a>
      </Link>
      <Link href="/about">
        <a>
          <div className={styles.item}>About</div>
        </a>
      </Link>
      <Link href="/contact">
        <a>
          <div className={styles.item}>Contact</div>
        </a>
      </Link>
    </div>
  );
}
Now we can start adding titles and meta tags for each page.
Title and meta tags for the entire app
When a person tries to access any pages in a Next.js app, it first reaches the _app.js component. From here, the pages are rendered. So if wanted to add components to display on all pages or the entire app, we need to place them here. Here we are going to add a Navigation component we created earlier.
import Navigation from "../components/Navigation";So if we need to want meta tags for all the pages in our app, we need to place them inside the _app.js component.
So, as we discussed before, we need to import the head component first.
import Head from "next/head";Now we can append all our header tags inside this head component.
  <Head>
        <meta charset="UTF-8" />
        <meta name="keywords" content="titla, meta, nextjs" />
        <meta name="author" content="Syamlal CM" />
        <meta name="viewport" content="width=device-width, initial-scale=1.0" />
      </Head>
So that the entire _app.js file looks like,
import Head from "next/head";
import Navigation from "../components/Navigation";
import "../styles/globals.css";

function MyApp({ Component, pageProps }) {
  return (
    <div>
      <Head>
        <meta charset="UTF-8" />
        <meta name="keywords" content="titla, meta, nextjs" />
        <meta name="author" content="Syamlal CM" />
        <meta name="viewport" content="width=device-width, initial-scale=1.0" />
      </Head>
      <Navigation />
      <Component {...pageProps} />
    </div>
  );
}

export default MyApp;
Add title and meta tags for each pages
Now we can add title and meta tags for each page of our next.js app. The steps are the same as we did in the previous step. import head component and append title and meta tags inside it.
The code on the home page will look the same as below.
// pages/index.js

import Head from "next/head";

export default function Home() {
  return (
    <div>
      <Head>
        <title>Home - TitleMetaNextjs</title>
        <meta name="description" content="Meta description for the Home page" />
      </Head>
      <div>
        <h1>This is Home page</h1>
      </div>
    </div>
  );
}
In the same manner, we can add the title and meta tags inside the about page. the entire code looks the same as below.
// pages/about.js

import Head from "next/head";

export default function About() {
  return (
    <div>
      <Head>
        <title>About - TitleMetaNextjs</title>
        <meta
          name="description"
          content="Meta description for the About page"
        />
      </Head>
      <div>
        <h1>This is About page</h1>
      </div>
    </div>
  );
}
At last, we can add the same information on the contact page, and the code looks the same as below.
// pages/contact.js

import Head from "next/head";
import styles from "../styles/Home.module.css";

import Head from "next/head";

export default function Contact() {
  return (
    <div>
      <Head>
        <title>Contact - TitleMetaNextjs</title>
        <meta
          name="description"
          content="Meta description for the Contact page"
        />
      </Head>
      <div>
        <h1>This is Contact page</h1>
      </div>
    </div>
  );
}
Adding module-wise style for the Navigation component(optional)
Let us add some styles for the Navigation component we created. This is optional in the case of this article.
// styles/Navigation.module.css

.navigation {
  position: sticky;
  top: 0;
  display: -webkit-flex;
  display: -moz-box;
  display: flex;
  -webkit-justify-content: space-between;
  -moz-box-pack: justify;
  justify-content: space-evenly;
  -webkit-box-shadow: 0 0 20px rgb(0 0 0 / 20%);
  box-shadow: 0 0 20px rgb(0 0 0 / 20%);
  width: 100%;
  height: 5rem;
  align-items: center;
}

.navigation .item {
  list-style: none;
  padding: 0.5rem 1rem;
  cursor: pointer;
}
.navigation .item:hover {
  color: rgb(151, 151, 151);
}
Codesandbox
Refer to the CodeSandbox link to view the live app. You can clone this project to your CodeSandbox account and edit the code also.
https://codesandbox.io/s/lucid-feather-pspqb
GitHub
You can always refer to the GitHub repository to clone this project, refer to the code and work on top of it.
https://github.com/techomoro/title-meta-nextjs
Summary
So here in this article, we discussed the steps to add title and meta tags for each page in a next.js app. We created a Next.js project, built a Navigation component, and added it globally, added title and meta tags globally and on each page.


One thought on “How to Add Title and Meta Tags for Each Page in Next.js”