
People are in love with native apps instead of web applications. Android/iOS applications are booming. In the same manner, desktop applications are accessible more easily than accessing it from a browser. There is an easy way of converting our web apps to native desktop or mobile apps using a technology called Progressive Web App or simply PWA. Here we will discuss the steps of creating a Progressive Web App (PWA) using the Next.js framework.
Prerequisites
Before continuing this article, I assume that you have a basic idea about:-
- Next.js framework
- Adding new packages in a Next.js app
- Progressive Web Apps
What we will learn
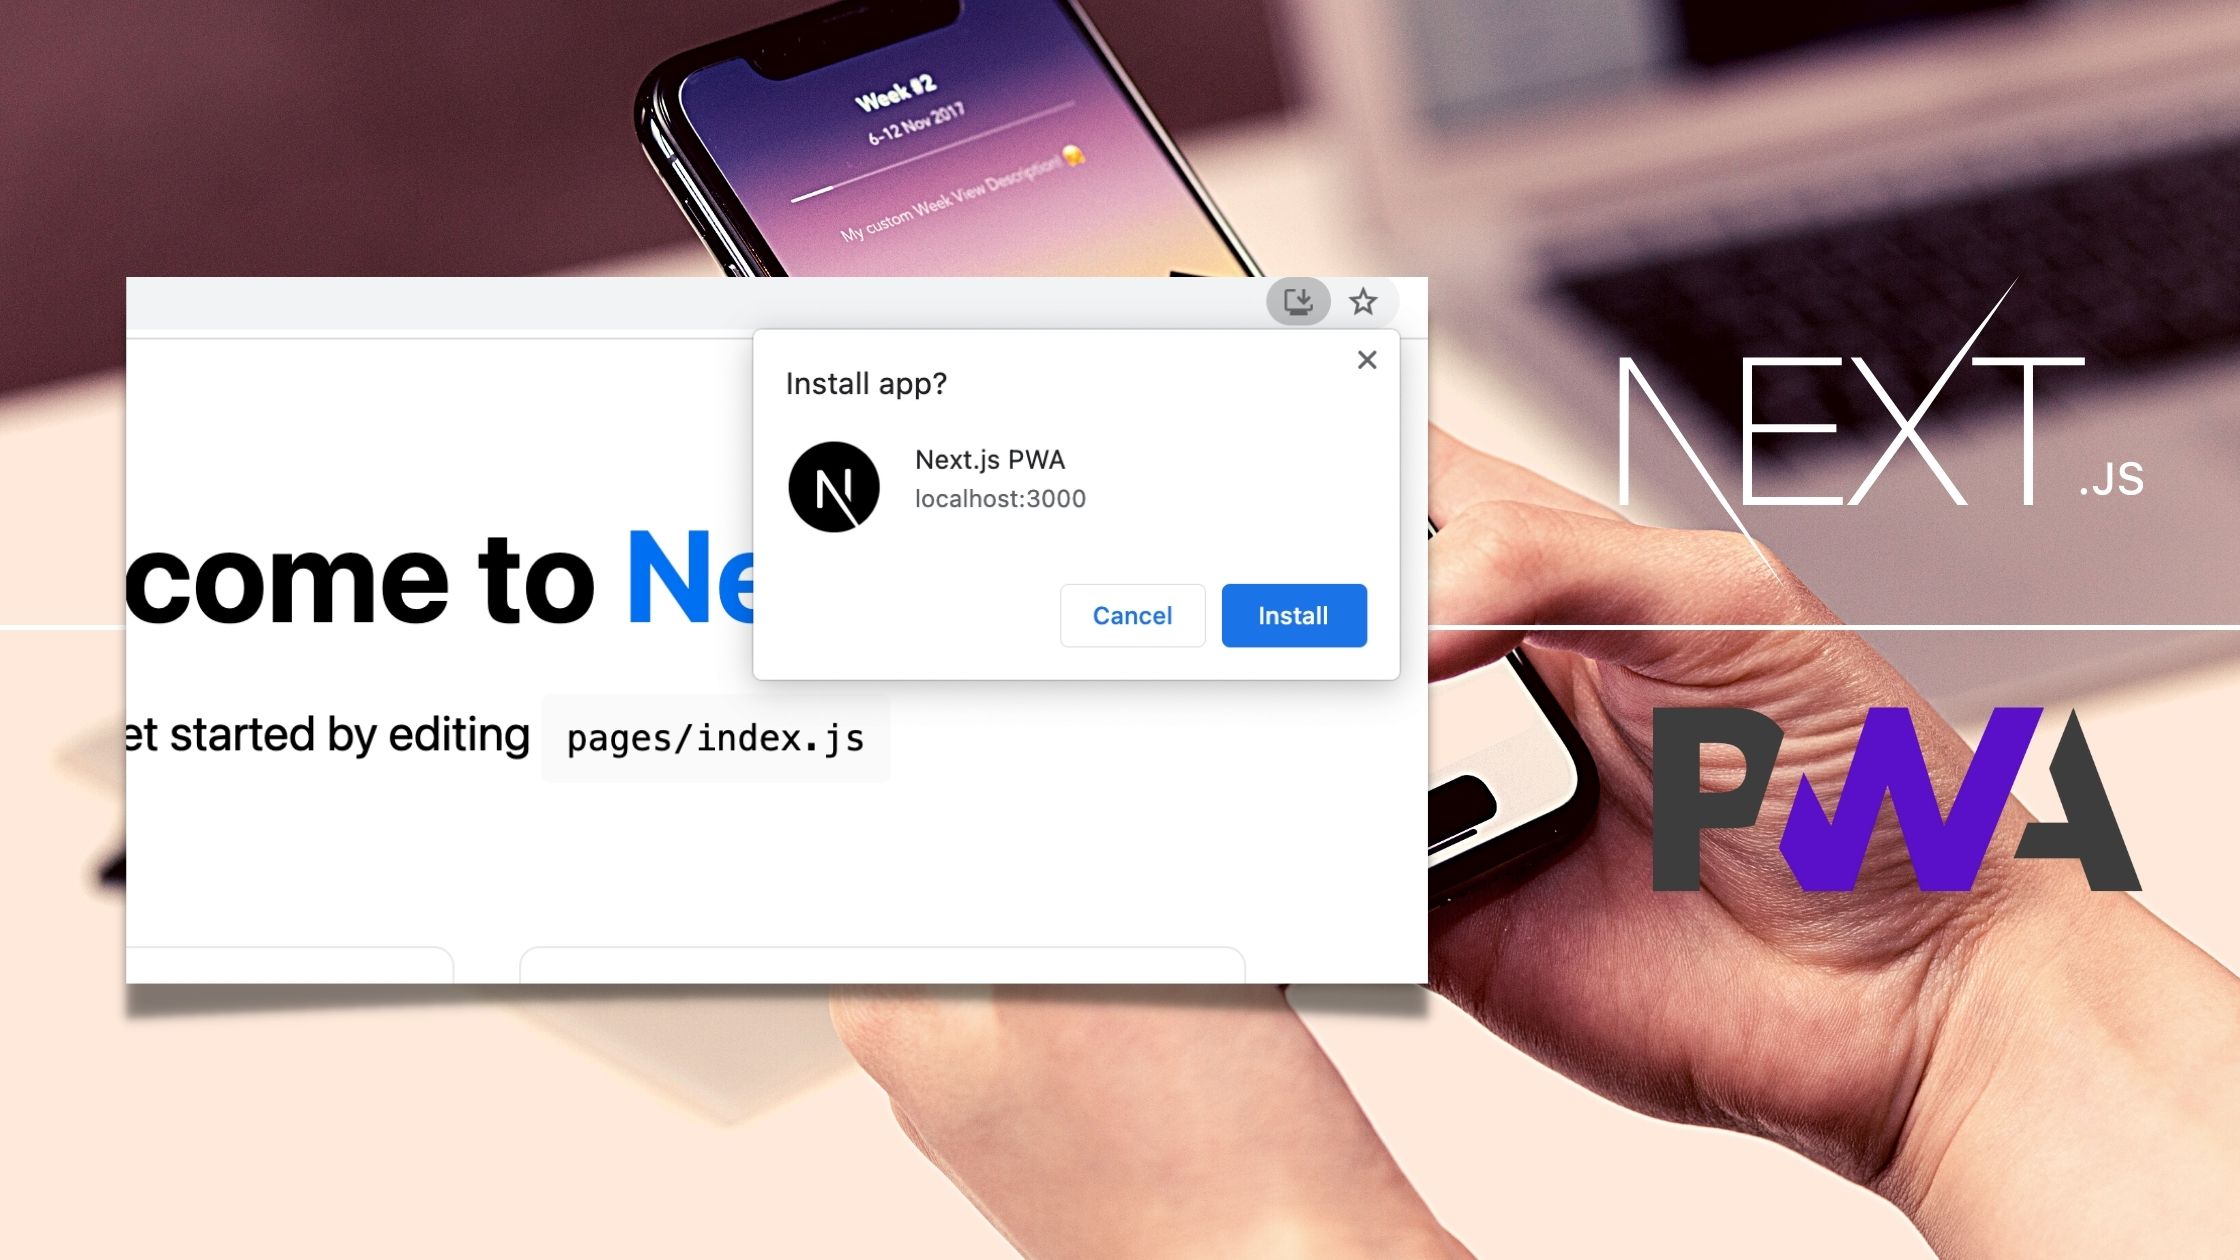
Here in this article, we will learn to create a Progressive Web App (PWA) using the Next.js framework. This method can be used to convert the existing Next.js app to a PWA.
After completing the steps, we will get an app showing the PWA icon, and clicking it will show a pop-up with the Install button that I have shown below.

What is PWA?
A Progressive Web App (PWA) is simply a web app that can work like a native app.
- Reliable : Fast loading and works offline
- Fast : Smooth Animations, jank free scrolling and seamless navigation even on flaky networks
- Engaging : Launched from home screen and can receive push notification
While accessing websites like Twitter.com, Youtube.com we can see an icon on the right side of the address bar. Clicking the icon will pop up a window that I have shown below. This is because Twitter is supporting the PWA feature.

Pressing the Install button will install Twitter in our system as an app itself. We can access this app from our Launchpad later.

Start a new Next.js project
After successfully installing Node.js on our system, we can easily create a new Next.js project using the below command.
npx create-next-app nextjs-pwa
This will create a new project named nextjs-pwa.

We can enter the directory and open the project with Visual Studio Code or any other code editor.
Note: We must install VS code on our system before executing the code. command below.
cd nextjs-pwa
code .
This will open our Next.js project in VS code as shown below.

Install next-pwa package
An NPM package, next-pwa is used to enable the feature of PWA in a Next.js app and we need to install it in our app. The below command will do it.
npm i next-pwa
Add next-pwa in config file
Now, inside the next.config.js, add the next-pwa package and export it using withPWA. So replace the next.config.js file using the below code.
// next.config.js

const withPWA = require("next-pwa");

module.exports = withPWA({
  pwa: {
    dest: "public",
    register: true,
    skipWaiting: true,
  },
});
Create a custom Document
A custom Document is commonly used to augment your application’s <html> and <body> tags. This is necessary because Next.js pages skip the definition of the surrounding document’s markup. For more information, refer to the official Next.js documentation.
To override the default Document, create the file ./pages/_document.js and extend the Document class.
// pages/_document.js

import Document, { Html, Head, Main, NextScript } from "next/document";

class MyDocument extends Document {
  render() {
    return (
      <Html>
        <Head>
          <link rel="manifest" href="/manifest.json" />
          <link rel="apple-touch-icon" href="/icon.png"></link>
          <meta name="theme-color" content="#fff" />
        </Head>
        <body>
          <Main />
          <NextScript />
        </body>
      </Html>
    );
  }
}

export default MyDocument;
Add Icon files
We know that every native app consists of an icon. So we need to add icons in two different sizes. Here I am adding an icon.png and icon-512*512.png inside the public directory.
You can download these icons from the below URLs.
https://github.com/techomoro/nextjs-pwa-demo/blob/main/public/icon.png

https://github.com/techomoro/nextjs-pwa-demo/blob/main/public/icon-512x512.png
Create a manifest.json
Now we need to create a manifest.json file inside the public directory. Here we will import the app icons, define the app name, theme colors, etc.
{
    "name": "Next.js PWA",
    "short_name": "Next PWA",
    "icons": [
      {
        "src": "/icon.png",
        "sizes": "192x192",
        "type": "image/png"
      },
      {
        "src": "/icon-512x512.png",
        "sizes": "512x512",
        "type": "image/png"
      }
    ],
    "theme_color": "#FFFFFF",
    "background_color": "#FFFFFF",
    "start_url": "/",
    "display": "standalone",
    "orientation": "portrait"
  }
Running the application
So the app we created can run locally on our system with the npm run dev command.
cd nextjs-pwa
npm run dev
This will open up the Next.js application in a new tab of our browser with the below URL.
https://localhost:3000
This will render the Next.js app we have created with PWA support.

Codesandbox
Refer to the CodeSandbox link to view the live app. You can clone this project to your CodeSandbox account and edit the code also.
https://codesandbox.io/s/sharp-darkness-pk1m0
GitHub
You can always refer to the GitHub repository to clone this project, refer to the code and work on top of it.
https://github.com/techomoro/nextjs-pwa-demo
Summary
Here we discussed the steps to create a Progressive Web App (PWA) using the Next.js framework. In the same manner, we can convert an existing Next.js app to PWA.
Thank you very much for your simple and understandable tutorials! You great blog is on my bookmarks now.
What if I want to generate the manifest dinamically?