

Creating and hosting a website is much easier in today’s world. Shared hosting was popular in the early years because of the huge maintenance charges we wanted to pay for providers like Amazon Web Services(AWS), Google cloud, Microsoft Azure, etc. These giant companies provide extra features like easy deployment of applications, backups, database management support, etc. That’s why these services are much costlier.
But somehow, if a person only needs to have a cloud server for cheap, we can create it on Digital ocean, Vultr, etc. These companies provide high specification cloud server for a cheap cost. The thing we need to bother about is, there won’t be any backups, deployment versions, database management, deployment assists, etc. in these plans. We will get our own cloud system and we can configure it as we want.
Here we are going to discuss the steps in setting up a cloud server on Vultr. Vultr provides cheap cloud server for a minimum of $5/month.
STEPS
1. CREATE A VULTR ACCOUNT
We first need to create an account on Vultr using the below link and verify our Email.
https://www.vultr.com/register/
2. COMPLETE BILLING INFORMATION
Now we can log in to our Vultr account. From here, we can create our server by clicking the Servers menu. But it will ask us for completing the billing information to finish server installation. So we can do it first.
https://my.vultr.com/billing/

We can add our Credit card details here, pay a minimum of $10 using it and simply complete our payment section.
Note: If we do not have a credit card, the easiest way is to Pay a minimum of $10 using Paypal.
The amount we paid will be credited to our Vultr account.
3. CREATE A SERVER INSTANCE
Now we can create our own cloud server from Instances tab in the Servers menu.

Press the plus icon to start the procedures.
- Select the location we want to set up our cloud. We are going with Silicon Valley here.

2. Now select a server type we want. We can customize any Operating system we want to install, but now I am going with Ubuntu 18.04 x64.

3. The steps 4,5 and 6 are optional and I am skipping it. But these features sometimes help us. Here we also need to provide a Server Hostname & Label.

Now pressing the Deploy Now button will create the server for us.
The created server can be found in the Servers menu.

4. ACCESSING THE CONSOLE
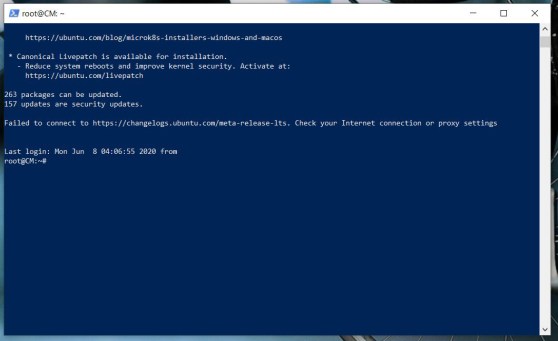
So we set up an Ubuntu server and now need to access the terminal for configuring our system. So select the Server from the Servers section. Now we can see our server details. Click on the desktop icon on the top right and enter our server credentials. This is our Ubuntu system’s terminal.


Alternative method(best method)
Another and best method of accessing the Console of our system is using ssh.
So if you are using Windows, open Command prompt, or PowerShell. Linux or macOS users open your Terminal.
Now execute the below command to connect to your server console.
ssh [server_username(root as default)]@[server_IP_Address]
eg:- ssh [email protected]
Summary
So in this article, we learned about cloud servers, cloud service providers, and set up a cloud server in Vultr. You can go with any other cloud service providers but at last, you will get a console like this. Actually the console is the terminal of the Ubuntu in our server. Any Linux command can be executed from here.


Be the first to reply