
We know that a react application is made up of components. The data from a component to another is passed via props. This data flow occurs from the parent to the child in a tree structure. But some of the components in between this data-flow may not require these data. Here the context API will help us to distribute the data to selected components.
The above paragraph may make us a bit confused. Let’s explain it with a diagram.

So we can understand that, without context API, the from parent component must be passed as props to reach the bottom child.
But with context API, the 3 bottom components are wrapped inside a Provider component and the state will send as value. This value can be accessed by any of the child.
What is a state management tool in React.js?
A state management tool enables the feature global state. Here we can store the data globally that can be accessed from any component if required.
In React, each component consist of states to store data. If a component needs to access the data or functions defined in another component, it is transferred via props.
But, as the React follows a tree structure, it will be difficult to pass the data between components in multiple levels.
Because, we need to pass the data using props between all the components that comes between the target and sender.
To avoid this situation, we use global states. This means some data that is required for multiple components will always store globally. So the component that needs the data can access it from the global state.
In React, the popular state management tool is Redux.
I have already published an article explaining the steps to build a React app using Redux. Refer to the below link to learn it.
Build a simple counter app using React and Redux.
With React version 16.3.0, it bundles with a built in state management tool, Context API.
Differences between Redux and Context API
- Context API is built-in with React 16.3.0 later versions. So we don’t need to install any extra packages for managing packages. Redux on the other hand needs to install separately.
- After the state update, the content API re-renders all the components. But in the case of Redux, only the updated component re-render.
- The learning curve of Context API is less compared to Redux.
- For projects including complex states and functions, Redux is best. Context API is best for simple projects that need a state management tool.
How to use context API in a React app
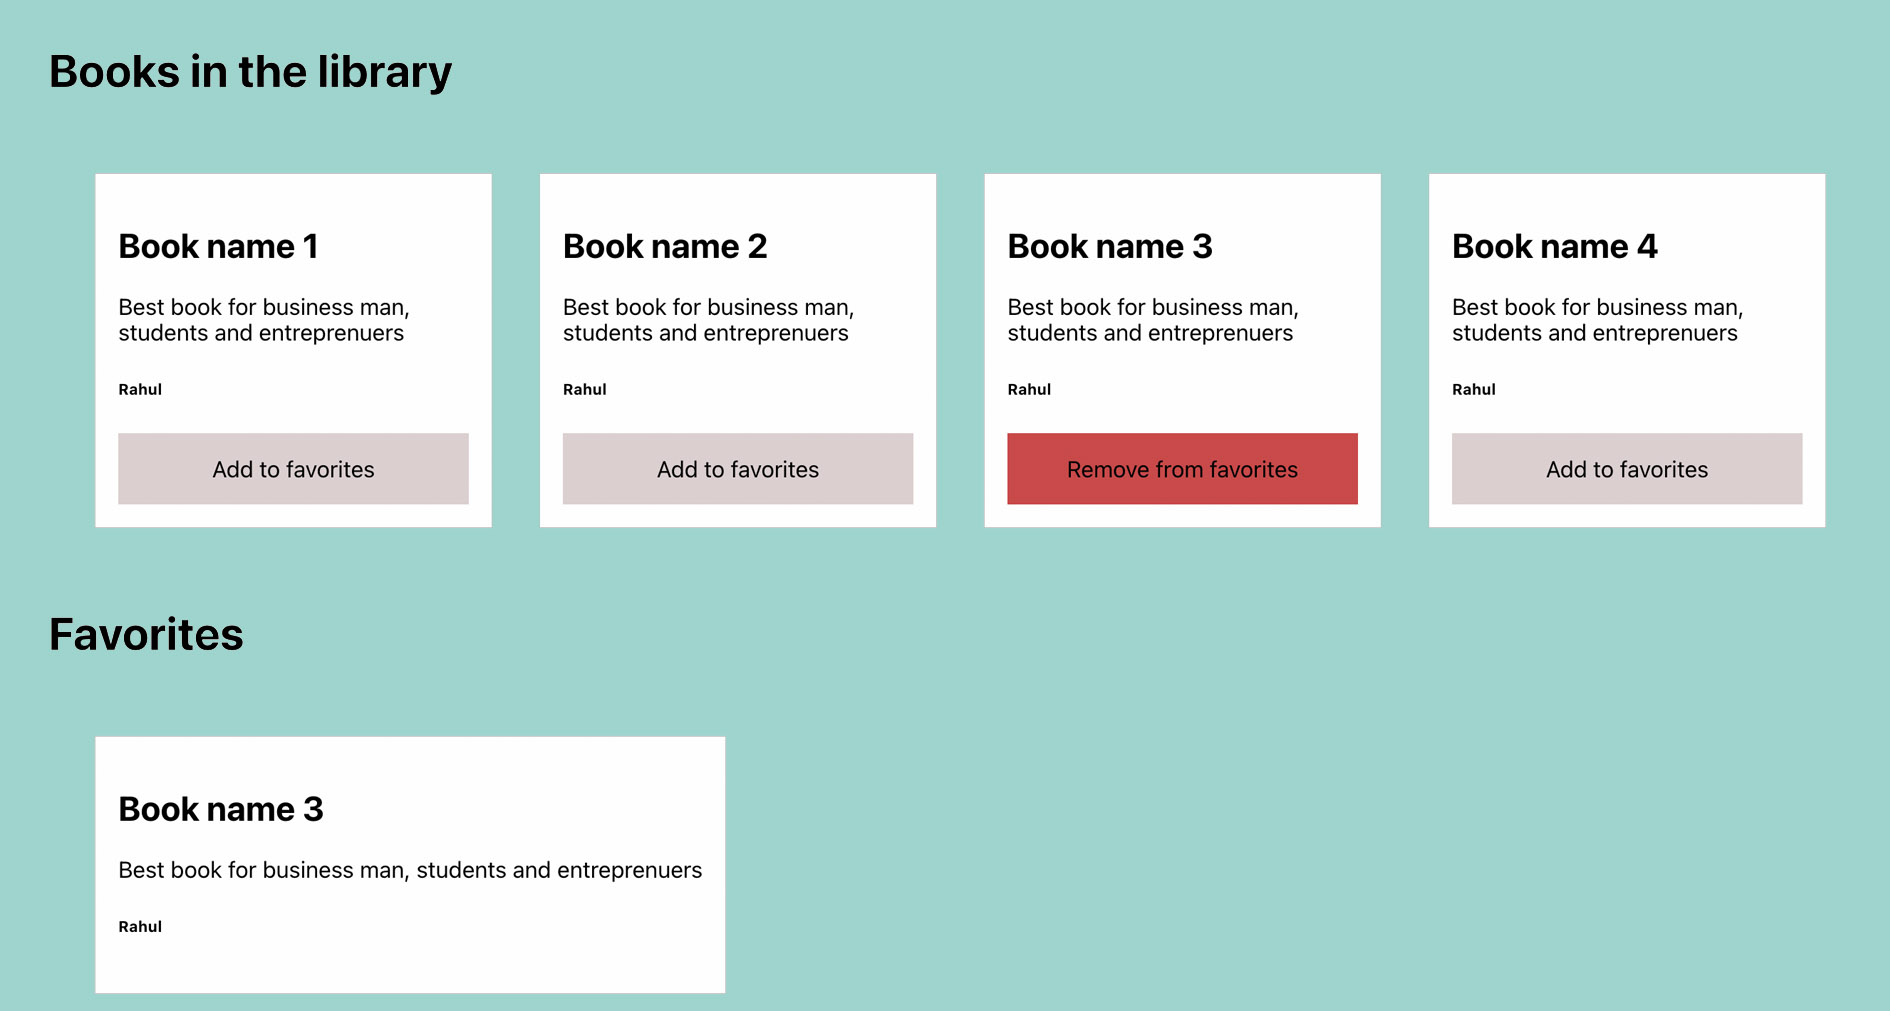
Here we are going to create a simple React app using Context API. This app contains a collection of books. When we click Add to favorites button, the book will add to favorites collection. Remove from favorites will remove it from the favorites collection.
The below representation will give an idea about the app we are going to build.

1. Install and setup a React app
After installing Node and NPM, create a new React application project using NPX tool.
npx create-react-app react-context-api-example
Now, enter to the project and open it using VS code or any other code editor.
cd react-context-api-example
code .
2. Create a context
Inside src directory, create a a file named AppContext. From there, export a context named AppContext with createContext API.
3. Declare global states and functions in App.js
Context API is used to get the features of global states. So declare and define the array of books first in App.js.
The AppContext file we have created earlier is also imported here.
We will also import a component named Library which contains Books and Favorites components. We will discuss about this component later.
Here we are taking App.js to store all these global states and functions.
addToFavorites function adds a book to favorites array and and removeFromFavorites function removes it from the favorites array.
import "./App.css";
import React, { Component } from "react";
import Library from "./components/Library";
import AppContext from "./AppContext";

class App extends Component {

  constructor() {
    super();
    this.state = {
      books: [
        {
          _id: "1",
          title: "Book name 1",
          description: "Best book for business man, students and entreprenuers",
          author: "Rahul",
        },
        {
          _id: "2",
          title: "Book name 2",
          description: "Best book for business man, students and entreprenuers",
          author: "Rahul",
        },
        {
          _id: "3",
          title: "Book name 3",
          description: "Best book for business man, students and entreprenuers",
          author: "Rahul",
        },
        {
          _id: "4",
          title: "Book name 4",
          description: "Best book for business man, students and entreprenuers",
          author: "Rahul",
        },
      ],
      favorites: [],
    };
  }

  addToFavorites = (book) => {
    if (!this.state.favorites.includes(book)) {
      this.setState({
        favorites: [...this.state.favorites, book],
      });
    }
  };

  removeFromFavorites = (book) => {
    this.state.favorites.map((favorite, index) => {
      if (favorite._id == book._id) {
        this.state.favorites.splice(index, 1);
      }
    });
    this.setState({
      favorites: this.state.favorites,
    });
  };
render(){
}


export default App;
Now inside the render, we need to call the Library component. But this must be wrapped inside <AppContext.Provider></AppContext.Provider>
Then only we can use the global states and functions from child components.
The state and functions in App.js and passed globally via a variable called value.
So, calling value.state from any component will return all the states in App.js.
  render() {
    return (
      <AppContext.Provider
        value={{
          state: this.state,
          addToFavorites: this.addToFavorites,
          removeFromFavorites: this.removeFromFavorites,
        }}
      >
        <Library />
      </AppContext.Provider>
    );
  }
}
So that the complete App.js file looks the same as below.
4. Create a Books component
We have a collection of books to show in the form of array. So a Books.jsx component is defined to render this.
useContext API used here to access the value from global state.
Here, value.state.books will return the collection of books in App.js component. Also, the addToFavorites and removeFromFavorites function will add and remove the book passed as the parameter, to and from the favorites array.
5. Create a Favorites component
In the same manner, create a Favorites component to render the favorites array collection.
6. Library component
A Library component is also added to contain both Books and Favorites components. This component is called from App.js.
Because we are using Context API, the state and function from App.js do not need to pass through Library component to reach Books and Favorites component.
This is the actual advantage of Context API.
Codesandbox
Refer to the CodeSandbox link to view the live app.
https://codesandbox.io/s/trusting-boyd-s6o4n
GitHub
You can always refer to the GitHub repository to clone this project.
https://github.com/syamjayaraj/ReactContextAPIExampleProject
Summary
So in this article, we learnt what is a state management tool, the differenced between popular state management tools Redux and Context API, and creating a React app using Context API.


Be the first to reply