
How to Create a Todo list Application in Laravel 5.6 | Laravel is a powerful PHP framework and can be used to build any complex applications. But here I am going to create a simple Todo list application using Laravel 5.6. The operating system I am using here is Ubuntu 17.10.
1. INSTALL AND SETUP LARAVEL 5.6
I already made a tutorial on installing and setting up Laravel 5.6 (The link below). It’s the first step in this tutorial. But note that you have to change the project name AwesomeProject to LaravelTodo (Step 5) and also, the database name you are giving on step 9 has to be laraveltodo-db. Because in this tutorial, I am using those details. It is not mandatory for you to follow my naming systems. You can choose your own. In that case, you have to use them in the upcoming steps too.
https://www.techomoro.com/how-to-install-and-setup-laravel-5-6-on-ubuntu-17-10
2. CREATE MODEL, MIGRATION, AND CONTROLLER
As I already told you in my previous tutorial, Laravel is an MVC ( Model View Controller) framework. It means that an application made using Laravel must contain 3 sections.
- A database section and a model to manage each of the databases.
- A Controller section associated with each of the models created.
- A View section
The description above is not exact. But it will give you an idea of basic MVC and laravel structure. Now we need to make a model and also the migration and controller associated with it. For this,
php artisan make:model Task -mc
Here Task is the model name and -mc will create migration and controller associated with the model. Migration simply means the database schema.
After executing this command, it automatically creates 3 files. Task.php on your app directory, TaskController.php on app/Http/Controllers directory and *_create_tasks_table.php on your database/migrations directory.
3. EDIT DATABASE SCHEMA
The database schema associated with the model you created is *_create_tasks_table.php inside your database/migrations directory. It will be like below.
<?php

use Illuminate\Support\Facades\Schema;
use Illuminate\Database\Schema\Blueprint;
use Illuminate\Database\Migrations\Migration;

class CreateTasksTable extends Migration
{
/**
* Run the migrations.
*
* @return void
*/
public function up()
{
Schema::create('tasks', function (Blueprint $table) {
$table->increments('id');
$table->timestamps();
});
}

/**
* Reverse the migrations.
*
* @return void
*/
public function down()
{
Schema::dropIfExists('tasks');
}
}
The code I bolded are the coloumn names of the table.
$table->increments(‘id’); // stores the id for each row.
$table->timestamps(); // stores created_at and updated_at details of each row.
I am going to add two columns to the database.
$table->string(“task”); // to store task names.
$table->boolean(“iscompleted”); // to store whether the task is completed or not.
Now the *_create_tasks_table.php file will be like below.
<?php

use Illuminate\Support\Facades\Schema;
use Illuminate\Database\Schema\Blueprint;
use Illuminate\Database\Migrations\Migration;

class CreateTasksTable extends Migration
{
/**
* Run the migrations.
*
* @return void
*/
public function up()
{
Schema::create('tasks', function (Blueprint $table) {
$table->increments('id');
$table->timestamps();
$table->string("task");
$table->boolean("iscompleted");
});
}

/**
* Reverse the migrations.
*
* @return void
*/
public function down()
{
Schema::dropIfExists('tasks');
}
}
4. MIGRATE THE DATABASE
We setup database and schema in the previous steps and it needs to be migrated to MySQL in localhost. For this,
On Terminal,
php artisan migrate
5. EDIT CONTROLLER
Controller section handles the functions of our laravel application. So, it needs to edit the controller TaskController.php we made to define functions of our app. The default code in TaskController.php needs to replace as below.
<?php

namespace App\Http\Controllers;

use Illuminate\Http\Request;
use Illuminate\Support\Facades\Redirect;

use App\Task;

class TaskController extends Controller
{
public function index(){
$tasks = Task::where("iscompleted", false)->orderBy("id", "DEC")->get();
$completed_tasks = Task::where("iscompleted", true)->get();
return view("welcome", compact("tasks", "completed_tasks"));
}
public function store(Request $request)
{
$input = $request->all();
$task = new Task();
$task->task = request("task");
$task->save();
return Redirect::back()->with("message", "Task has been added");
}
public function complete($id)
{
$task = Task::find($id);
$task->iscompleted = true;
$task->save();
return Redirect::back()->with("message", "Task has been added to completed list");
}
public function destroy($id)
{
$task = Task::find($id);
$task->delete();
return Redirect::back()->with('message', "Task has been deleted");
}
}
The basic duty of the functions we defined is as explained below.
- Index() function returns homepage welcome.blade.php with both the incomplete and completed tasks.
- store() function stores the task we add from the front end.
- complete() function changes the iscompleted value of the row found using id from false to true
- delete() function finds the task with the id in the parameter and deletes the task.
6. SETUP FRONTEND
resources/views directory contains the viewing section of Laravel. By default, you can see welcome.blade.php . This is the page we are getting on http://localhost:8000 address now. We have to edit this. But before that, we are creating a layouts directory inside views. And inside that directory make a file named app.blade.php . copy the code below and paste in it. Now save the file.
<!DOCTYPE html>
<html>
<head>
<title>Todo List</title>
<link href="https://stackpath.bootstrapcdn.com/bootstrap/4.1.1/css/bootstrap.min.css" rel="stylesheet">
<script src="https://stackpath.bootstrapcdn.com/bootstrap/4.1.1/js/bootstrap.min.js"></script>
</head>
<body>
@yield("content")
</body>
</html>
The bolded portion in the above code is a portion of the page which is defined in welcome.blade.php file. I know that it will make you a little bit confusing. I can explain it to you. But before that, you have to do one more thing. Open welcome.blade.php and replace the whole code with the below code.
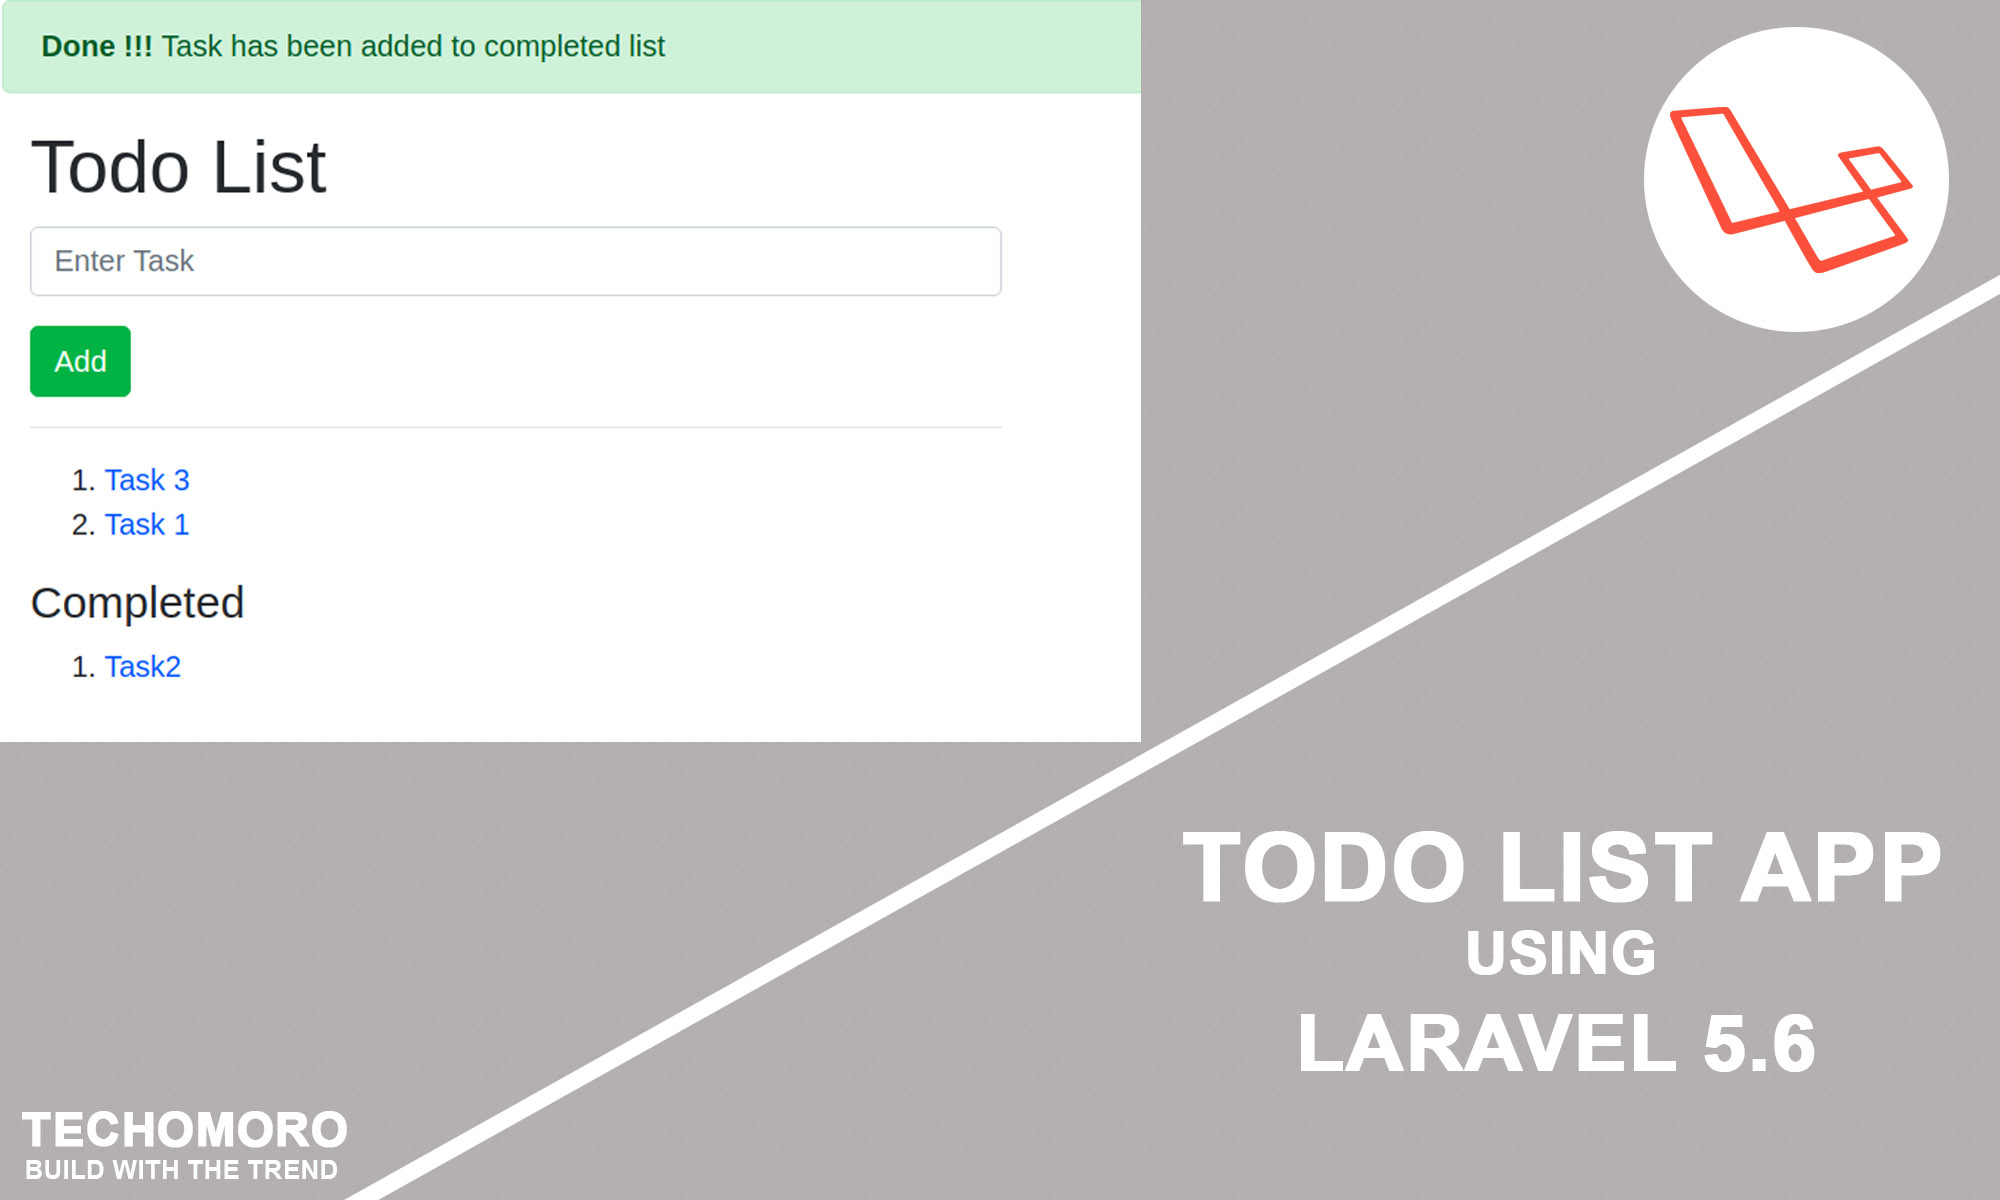
@extends("layouts.app")
@section("content")
<div class="container">
@if(session()->has('message'))
<div class="alert alert-success alert-dismissible fade show" role="alert">
<strong>Done !!! </strong>{{ session()->get('message') }}
<button type="button" class="close" data-dismiss="alert" aria-label="Close">
<span aria-hidden="true">×</span>
</button>
</div>
@endif
<div class="col-md-6">
<h1>Todo List</h1>
<form method="POST" action={{url('/task')}}>
{{csrf_field()}}
<div class="form-group">
<input type="text" class="form-control" name="task" placeholder="Enter Task">
</div>
<div class="form-group">
<button type="submit" class="btn btn-success">Add</button>
</div>
</form>
<hr>
<ol>
@foreach($tasks as $task)
<li><a href ={{url('/'.$task->id.'/complete')}}>{{ $task->task }}</a></li>
@endforeach
</ol>
<h4>Completed</h4>
<ol>
@foreach($completed_tasks as $c_task)
<li><a href ={{url('/'.$c_task->id.'/delete')}}>{{ $c_task->task }}</a></li>
@endforeach
</ol>
</div>
</div>
@endsection
Now it’s time for some explanation.
The rendering of our view starts from welcome.blade.php ( as defined in web.php default). In that file, we can see @extends(“layouts.app”) at the top. So the blade template funtion extends the code inside layouts.app.blade.php to welcome.blade.php . Now it got html formating, bootstrap, javascript inside app.blade.php . Also @yield(“content”) is replaced with the content section in welcome.blade.php. These all are handled by blade template itself.
We already passed the variables tasks and completed_tasks with the view. Now it is easy to iterate through these objects using a foreach . That is exactly the code I bolded on the above code.
7. EDIT WEB.PHP
This is the last step of this application. We have made frontend links for task completion and task deletion in previous steps and also the controllers for making a task complete and delete. Now we need to tell laravel that which function is to be performed after clicking the specific links in the frontend. This is coded inside routes/web.php file.
<?php
Route::get('/', "TaskController@index");
Route::post("/task", "TaskController@store");
Route::get("/{id}/complete", "TaskController@complete");
Route::get("/{id}/delete", "TaskController@destroy");
The id in the link is passed to the controller function as the function parameter.
GITHUB
The complete project I created is uploaded in GitHub and you can always refer it.
https://github.com/syamjayaraj/simpleLaravelTodoApp
Have a nice code !

Fatal error: Uncaught Error: Class ‘Route’ not found in D:\xampp\htdocs\ToDoList\routes\web.php:2 Stack trace: #0 {main} thrown in D:\xampp\htdocs\ToDoList\routes\web.php on line 2
Hi Syamlal ! i do all everything like you done on your “todo_list” of laravel. But i have a problem above.