
I have already created an article, How To Add An XML Sitemap In A Next.Js App. Then what is the importance of this article? In that article, I explained the method of adding an XML sitemap manually just for static pages in our Next.js 12 app. But here in this article, we will discuss the method to generate a sitemap for static and dynamic pages in Next.js 12.
Prerequisites
Before continuing this article, I strictly recommend you to read my previous article, How To Add An XML Sitemap In A Next.Js App.
This will give you a basic understanding of what a sitemap is and its importance in SEO.
To understand the article, you also must be aware of the Next.js framework, usage of getStaticProps, and getStaticPaths in it.
What we will learn
Here we will learn to generate the sitemap for static and dynamic pages in a Next.js app. The package Next-sitemap is helping us to do this easily.
- We will create a Next.js 12 app
- Create dynamic pages that are generated according to the data
- Static path generation
- Generate the sitemap for static and dynamic pages
Create a Next.js app with a home page and a post details page
Create a Next.js app that shows some posts on the home page and a post details page to show a single post. We will also create a 404 page to be displayed when there is no data is coming from the API.
Create a Next.js App using the NPX tool
First, we need to create a Next.js application using the NPX tool. Don’t worry about NPX, because it’s a tool coming with NPM(Node Package Manager) 5.2+ onwards.
So, after the successful installation of Node.js, create a Next.js application using NPX.
npx create-next-app@12 next-sitemap-demo-app
This command will create a Next.js application with the project name next-sitemap-demo-app.

Now enter the project directory and start the app.
cd next-sitemap-demo-app
npm run dev
It will open up the Next application we have created in our browser window with the address https://localhost:3000.

If you need further assistance in this step, I wrote an article to install and set up a Next.js app on Windows 10.
We can open up the project with Visual Studio Code or any other code editor.

Code the home page to show all the posts
We are creating a home page to show all the posts data from the API below.
https://jsonplaceholder.typicode.com/posts
I am not explaining the concept here. The complete code for the home page will look the same as below.
import styles from "../styles/Home.module.css";
import Link from "next/link";
export default function Home({ posts }) {
return (
<div className={styles.container}>
<main className={styles.main}>
<h1 className={styles.title}>Posts</h1>
<div className={styles.grid}>
{posts?.map((item, index) => {
return (
<Link href={`/${item?.id?.toString()}`} key={index}>
<a className={styles.card}>
<h2>{item?.title} →</h2>
<p>{item?.body}</p>
</a>
</Link>
);
})}
</div>
</main>
</div>
);
}
export async function getStaticProps() {
let posts = await fetch("https://jsonplaceholder.typicode.com/posts");
posts = await posts.json();
if (Object.keys(posts).length === 0) {
return {
notFound: true,
props: {},
revalidate: 10,
};
}
return {
props: {
posts: posts || null,
},
revalidate: 10,
};
}Page to display single post
We are coding another page to display a single post. Here we are using the API URL below where the value postId is the id of each post.
https://jsonplaceholder.typicode.com/posts/${postId}
We are also creating static paths for each post page. The complete code of [postId].js is given below.
import styles from "../styles/Home.module.css";

export default function Post({ post }) {
  return (
    <div className={styles.container}>
      <main className={styles.main}>
        <h1 className={styles.title}>{post?.title}</h1>
        <p>{post?.body}</p>
      </main>
    </div>
  );
}

export async function getStaticProps({ params }) {
  let postId = params.postId;
  let post = await fetch(
    `https://jsonplaceholder.typicode.com/posts/${postId}`
  );
  post = await post.json();
  if (Object.keys(post).length === 0) {
    console.log("inside");
    return {
      notFound: true,
      props: {},
      revalidate: 10,
    };
  }

  return {
    props: {
      post: post || null,
    },
    revalidate: 10,
  };
}

export async function getStaticPaths() {
  let posts = await fetch("https://jsonplaceholder.typicode.com/posts");
  posts = await posts.json();
  let paths = [];
  posts.forEach((item) => {
    paths.push({
      params: {
        postId: item.id.toString(),
      },
    });
  });

  return {
    paths,
    fallback: true,
  };
}
404 page
Let us code a 404 page which should be displayed when there is no data coming from the API.
import styles from "../styles/Home.module.css";

export default function NotFound() {
  console.log("hai");
  return (
    <div className={styles.container}>
      <main className={styles.main}>
        <h1 className={styles.title}>404 - Page Not Found</h1>
      </main>
    </div>
  );
}
Generate a sitemap for static and dynamic pages in a Next.js app
Now let us enter the topic. We need to generate the sitemap for the app we have created above.
Install the Next-Sitemap package
We are using a package next-sitemap for generating the sitemap in our Next.js app. The following command will install the package inside our Nextjs app.
npm i next-sitemap
Add the next-sitemap file
In the root directory of our folder, create a file next-sitemap.js to configure our sitemap. Here we are adding the paths to be excluded from the sitemap such as the 404 page.
The next-sitemap package also creates a robot.txt file and we can also add paths to be in that file.
Here we can also add additional sitemaps that will also be included in the main sitemap.xml file.
Here we are adding server-sitemap.xml where all the dynamic URLs are created. This will be explained in the next step.
Note that the will add the .env.local file later where we get our site domain URL using process.env.NEXT_PUBLIC_DOMAIN_URL.
const siteUrl = process.env.NEXT_PUBLIC_DOMAIN_URL;
module.exports = {
  siteUrl,
  exclude: ["/404"],
  generateRobotsTxt: true,
  robotsTxtOptions: {
    policies: [
      {
        userAgent: "*",
        disallow: ["/404"],
      },
      { userAgent: "*", allow: "/" },
    ],
    additionalSitemaps: [
      `${siteUrl}sitemap.xml`,
      `${siteUrl}server-sitemap.xml`,
    ],
  },
};
Server-sitemap.xml inside the pages directory
Now let’s create a file index.js inside the pages/server-sitemap.xml directory. All the dynamic paths are added to the sitemap from here.
Here, all the post data are fetched and using the id of each post, we are creating the sitemap file.
import { getServerSideSitemap } from "next-sitemap";

export const getServerSideProps = async (ctx) => {
  let posts = await fetch("https://jsonplaceholder.typicode.com/posts");
  posts = await posts.json();
  const newsSitemaps = posts.map((item) => ({
    loc: `${process.env.NEXT_PUBLIC_DOMAIN_URL}${item.id.toString()}`,
    lastmod: new Date().toISOString(),
  }));

  const fields = [...newsSitemaps];

  return getServerSideSitemap(ctx, fields);
};

export default function Site() {}
Add next-sitemap as our postbuild script
Now we need to add the next-sitemap as our postbuild script inside the package.json file.
...
  "scripts": {
    ...
    "postbuild": "next-sitemap",
    ...
  },
...
So that the package.json file will look the same as below.

Add a .env.local file
Now add an env file .env.local where it contains the value NEXT_PUBLIC_DOMAIN_URL which is used in our app.
Here I am using a domain name https://kuty.me/ and you can use your own website domain name.
NEXT_PUBLIC_DOMAIN_URL = https://kuty.me/Generate the sitemap
The sitemap.xml file is generated during the build time. So execute the command below.
npm run build
This will create a production build locally. At the same time, the sitemap.xml and robots.txt files are also created inside the public directory.
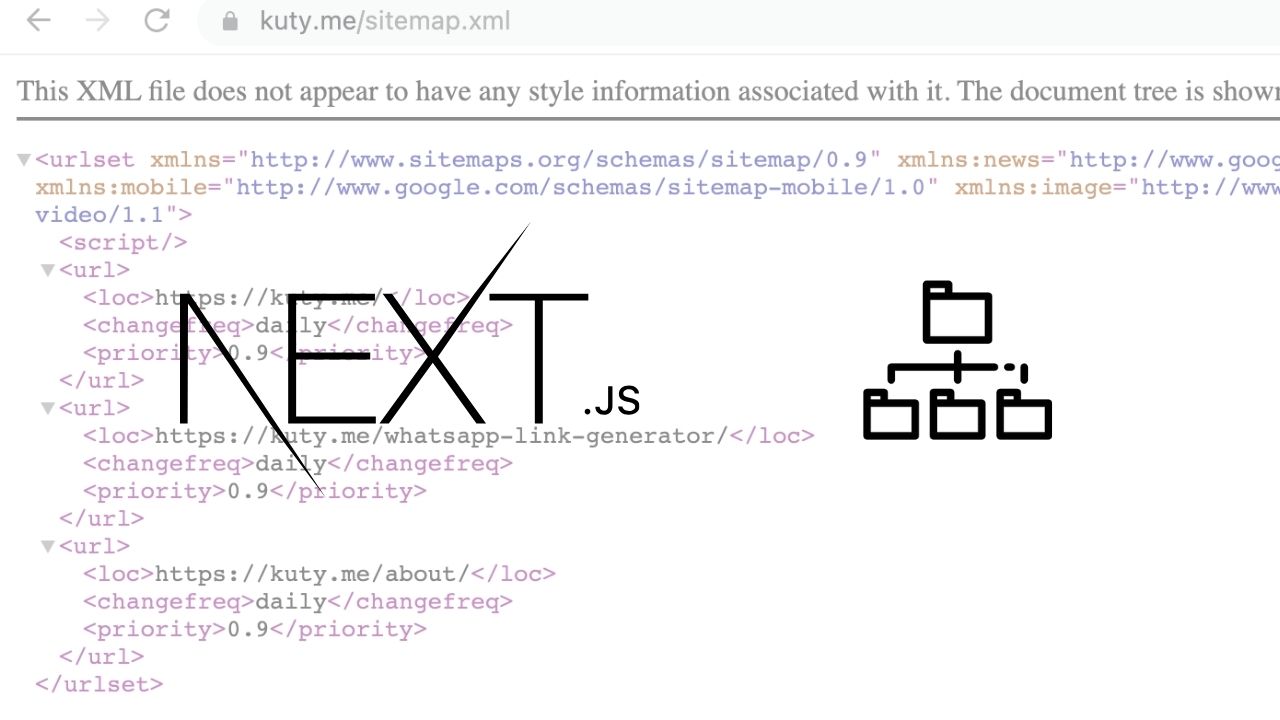
The sitemap.xml file will look the same as below.
<?xml version="1.0" encoding="UTF-8"?>
<sitemapindex xmlns="http://www.sitemaps.org/schemas/sitemap/0.9">
<sitemap><loc>https://kuty.me/sitemap-0.xml</loc></sitemap>
</sitemapindex>
We can see that it is linking to another sitemap file sitemap-0.xml and it contains all the URLs of our Next.js website. The sitemap-0.xml file will look the same as below.
We can see that it contains the homepage and all the post URLs in it.
<?xml version="1.0" encoding="UTF-8"?>
<urlset xmlns="http://www.sitemaps.org/schemas/sitemap/0.9" xmlns:news="http://www.google.com/schemas/sitemap-news/0.9" xmlns:xhtml="http://www.w3.org/1999/xhtml" xmlns:mobile="http://www.google.com/schemas/sitemap-mobile/1.0" xmlns:image="http://www.google.com/schemas/sitemap-image/1.1" xmlns:video="http://www.google.com/schemas/sitemap-video/1.1">

<url><loc>https://kuty.me</loc><changefreq>daily</changefreq><priority>0.7</priority><lastmod>2022-04-01T08:02:16.996Z</lastmod></url>

<url><loc>https://kuty.me/1</loc><changefreq>daily</changefreq><priority>0.7</priority><lastmod>2022-04-01T08:02:16.996Z</lastmod></url>

<url><loc>https://kuty.me/2</loc><changefreq>daily</changefreq><priority>0.7</priority><lastmod>2022-04-01T08:02:16.996Z</lastmod></url>

...
</urlset>
When logging into the below URL, we can see the sitemap.xml file locally.
http://localhost:3000/sitemap.xml

Add sitemap files to the .gitignore file
So we have generated the sitemap.xml file, sitemap-0.xml file, and robots.txt in our project. But we don’t need to push these files to our git repository because they should be created with each build.
So that we can add these file names in the .gitignore file.
...
# Sitemap file
sitemap.xml
sitemap-0.xml


# Robots.txt
robots.txt
So that the .gitignore file will look the same as below.

Codesandbox
Refer to the CodeSandbox link to view the live app. You can clone this project to your CodeSandbox account and edit the code also.
https://codesandbox.io/s/vibrant-dawn-fjg2gz
GitHub
You can always refer to the GitHub repository to clone this project, refer to the code and work on top of it.
https://github.com/techomoro/next-sitemap-demo-app
Summary
So here in this article, we have created a simple Next.js app and added a dynamic page that is generated using the data. We then generated the sitemap for our Next.js 12 app using the next-sitemap package.


Thanks for this. In your next-sitemap.config.js you have this line but I don’t think it’s necessary:
`${siteUrl}server-sitemap.xml`
From the files generated at the end of your tutorial, it seems that you removed this option from your own config. Is that correct?