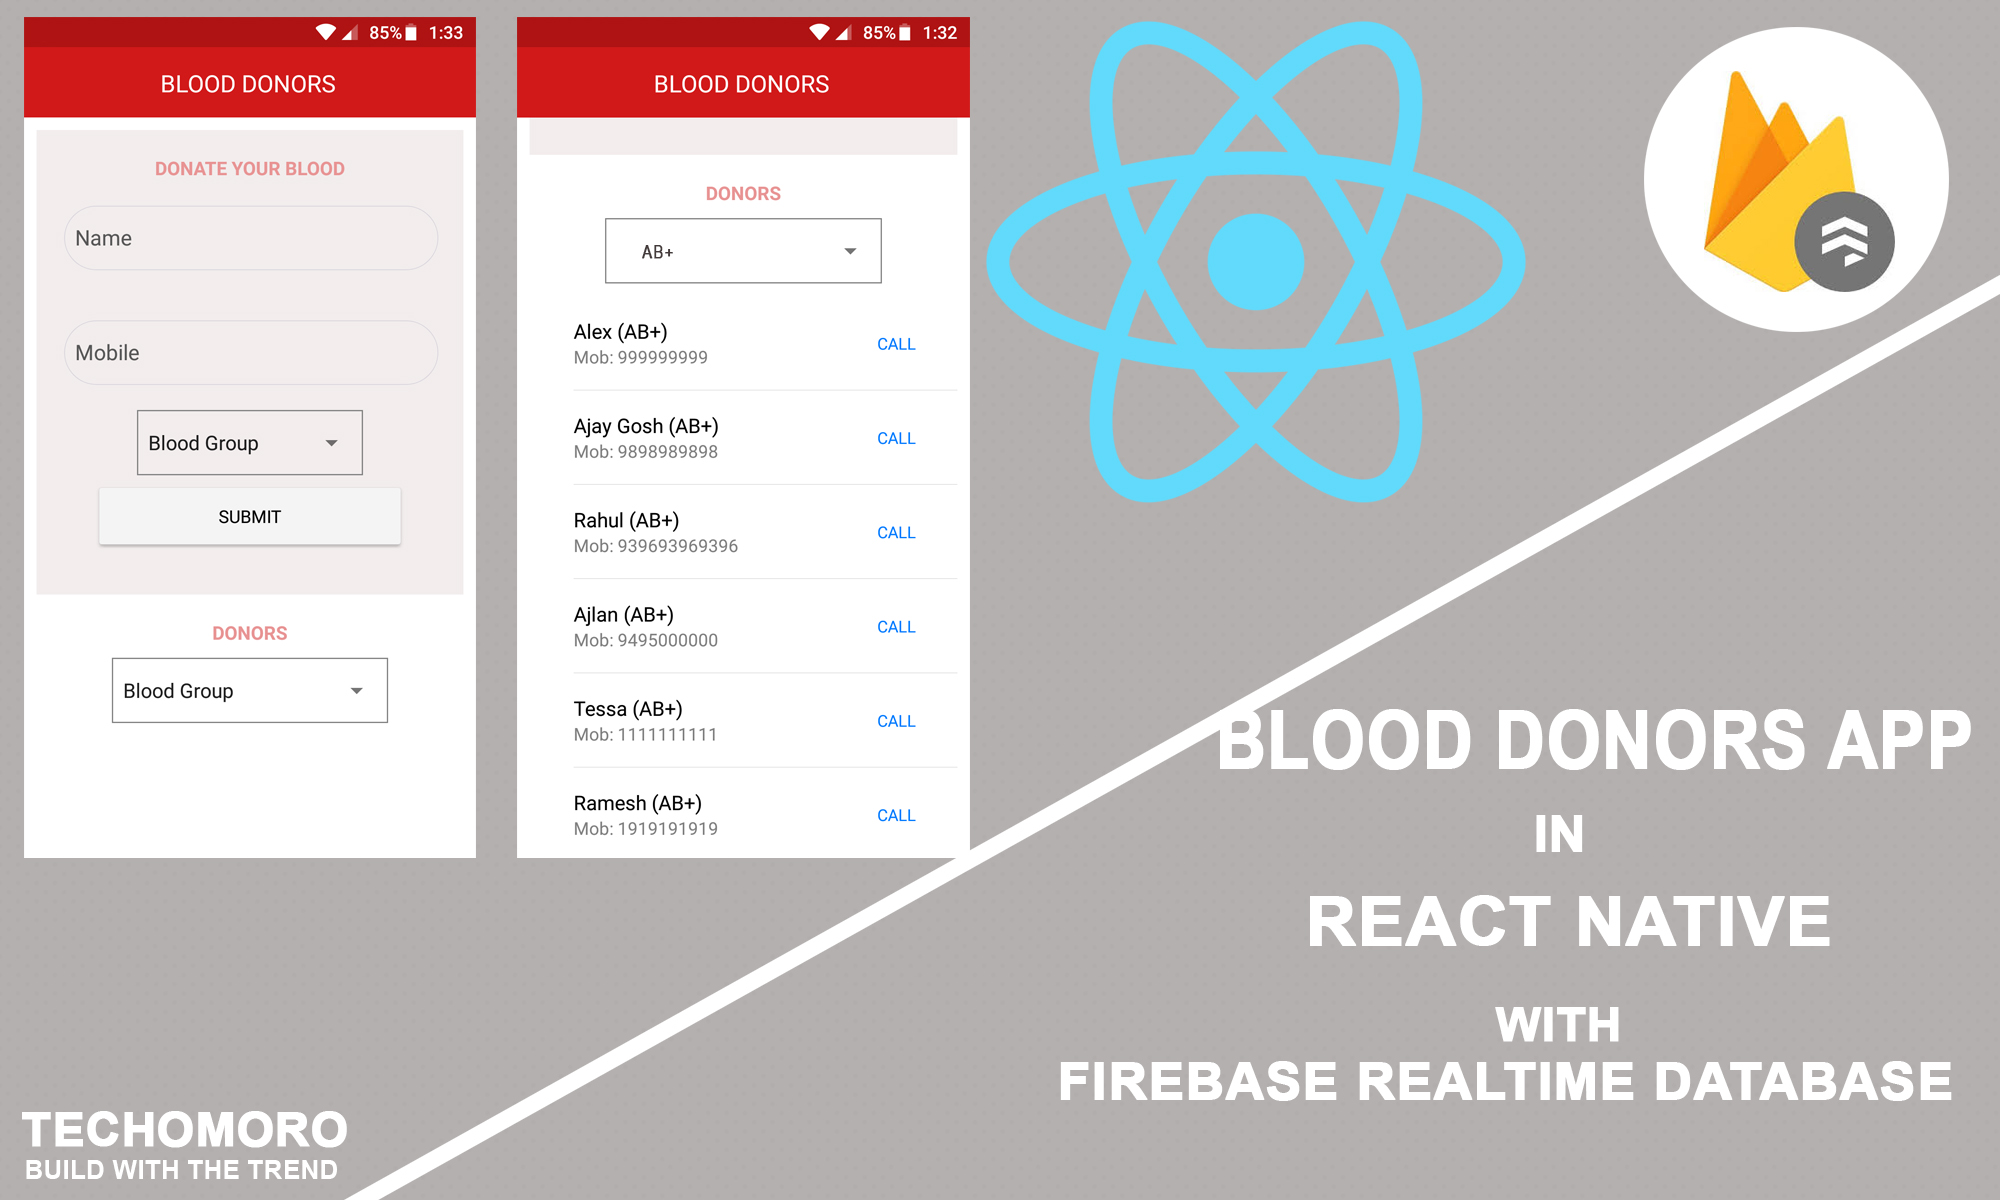
React Native is one of the best frameworks to build hybrid mobile applications compatible with both Android and iOS platforms. Google is providing us a limited free access to use Firebase Real-time Database with each Google account we create. So its easy for the developers to build a mobile app with database support. I am going to build a Blood Donors application in ReactNative. Here I am going to focus only on the Android platform.
FIREBASE
We are going to set up the firebase database first. Go to firebase console using the below link.
https://console.firebase.google.com/
Then click
Add Project. This will show a form and fill it with your
Project Name and
Country. Now accept the
terms and conditions and click
Create Project button. You can see the details I gave from the below image.

Your firebase project is created. You will e directed to a page as below.

From the side menu, select
Database. From there, you will get two database options such as
Cloud Firestore and
Realtime Database. Click an
Create Database button from
Realtime Database. Now it checks for the permission you wanted to give for the database. Select
Start in Test Mode and click
Enable. It is shown in the below image.

Now you will be directed to a page as below. Add a collection
by entering a collection name as I did. I gave the collection name
donors. It’s just a simple step by clicking the input field on the right of the project ID, input your collection name and press
Enter. Done.

You can also add some data to the DB with
name, mobile, group as the attributes. Not compulsory.
REACT NATIVE
1. INSTALL AND SETUP REACT NATIVE
I already made a tutorial on installing and setting up of React Native. You can see it from the link below. But note that you have to change the project name
AwesomeProject to
ReactnativeContactForm (
Step 9) because in this tutorial, I am using that name. But as I told, It is not mandatory for you to follow my naming convention. You can choose your own. In that case, you have to use them in the upcoming steps too.
https://www.techomoro.com/how-to-install-and-setup-react-native-on-ubuntu-17-10
2. INSTALL NATIVEBASE
Nativebase is a node package which allows you to use some UI components for React Native. If you can build your UI components using Flexbox, or you are using any other packages to setup UI, then this step is not mandatory for you.
npm install native-base --save
react-native link
3. INSTALL REACT-NATIVE-COMMUNICATIONS
React-native-communications is a node package which helps in opening a web address, easily call, email, text, iMessage (iOS only) someone in React Native application. Here I am using this package because it’s easy to make calls to the mobile number of each donor by clicking the
Call button right to each donor list.
npm install react-native-communications--save
4. EDIT APP.JS
The
index.js file is executed first in
React Native. As a default,
App.js file is imported to the
index. So The code inside
App.js is executed. The rendered view you are seeing first time on your device is coming from this file. We are going to edit this.
First, import all
components from their locations/ libraries. Some of the
components I imported from
native-base are also available in the
react-native library. I imported them from
native-base because they are pre-styled and it saves a lot of time.
Now add a class named
App and
export it.
Inside this class, define a
constructor function and declare all the
states we needed. The states are null by default.
isSubmitedis to store the submitted status of the form. Its value will be false as default.
Here, the
isSubmited state is to store the boolean value whether the donor form is successfully submitted or not. As a default, it will be
false and changes to true when the form is submitted. There are done with specific functions explained in the upcoming steps.
name, mobile, and
group states store the form data which are entered by the user.
donors array is to store the donor’s data fetched from Firebase.
groupToBeFiltered state stores the blood group to be filtered from the donor’s array. This is selected by the user using a Picker.
Now it needs the code for fetching the donors data from our Firebase DB. This is done inside
componentDidMount() . But I need to get the data every 1000 milliseconds. Because I need the data which are submitted just before. So I made a time interval of 1000 milliseconds using
setInterval() function and every 1000 milliseconds the
getDonor() function is called. So
getDonor() function fetches the tasks from Firebase DB in every 1000 milliseconds.
This collection of objects are converted to an array of objects and stored in
donor state.
In my case, the
databaseUrl of my firebase is
https://blood-donors-db.firebaseio.com/. You have to check your
databaseUrl. It’s simple. Go to
https://console.firebase.google.com/
Then select your
project and select
Add project to your web app button. You can see your
databseUrl there.
you have to add the
donors.json which is the collection name that you already created as the extension of the
databaseUrl.
The function I am going to add next is
addDonor() which is called when
Submit button is clicked. This function stores the donor data user entered through the input fields. It has parameters
name, mobile, group which contains the inputs field values. I am also checking that the form data is filled before submitting it to DB.
Now, a function
onValueChange(value) is added which is performed when the Picker value is changed by the user trying to add his data. The selected value is passed to the function as the value. This value is set to the state
group.
Similarly, another function
onValueChange2(value) is added to store the blood group to be filtered to the user looking for blood.
A
_toggleDonorPost() function is defined to change the state
isSubmitted to false which shows the form again to submit more than one user blood details.
It’s time to
render(). I am not splitting the render() function because it gets more complicated I think. I will explain it after the code.
The headers and status bar contents/ styles are defined inside
Header.
Using a ternary operator, I coded that if the state
isSubmitted is true, It shows an
Add more donors link. If it’s false, it shows a form to submit the donor details. These input fields are coded to store the changes made by the user to the corresponding states. The form also contains a picker to select the donor’s blood group. When the picker value is changed, it calls the
onChangeValue() function and this function sets the value to the state
group. Now a
Submit button is included which submits the data in the app states to firebase DB by calling
addDonor() function.
Now I am going to explain the view of donors data in the app. We already have all the donors details in our
donors state as an array of objects. This is filtered to the lists with blood groups selected by the user using the Picker. The filtered result is mapped through the
ids of each object in the array and displayed. I also added a
Call button to the right of each list element which makes a call to the corresponding mobile number of the user.
Its all done.
You can also add an icon to your app by referring the below link (optional).
https://www.techomoro.com/how-to-add-app-icon-to-react-native-android-app/
Also, generate a signed apk for your app (optional).
https://www.techomoro.com/how-to-generate-signed-apk-in-react-native/
GITHUB
The complete project I created is uploaded in GitHub and you can always refer it.
REACT NATIVE
https://github.com/syamjayaraj/BloodDonorsApp
Have a nice code !
Like this:
Like Loading...
You might like this


Be the first to reply